
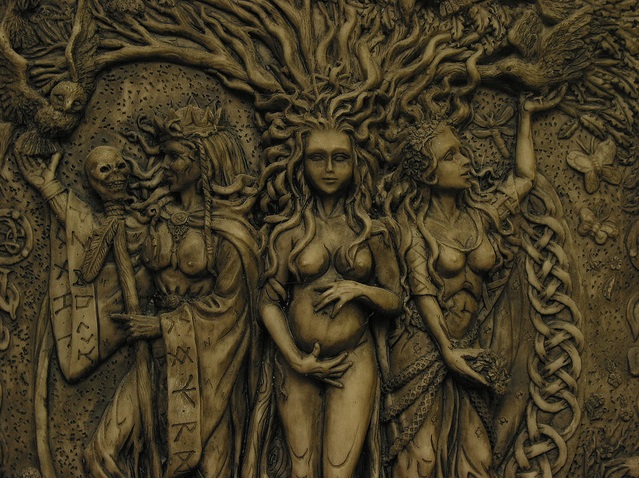
Imbolc is a fire festival beginning at sunset on January 31st, February 1st or 2nd, depending on the tradition you follow. It celebrates the earliest stirrings of spring and the recovery of the goddess after the birth of the god. It is also known as the festival of the Maiden. In some practices, Imbolc heralds the transformation of the Crone to her Maiden phase. In others, it is a preparation of this transition, which doesn’t actually occur until Ostara.
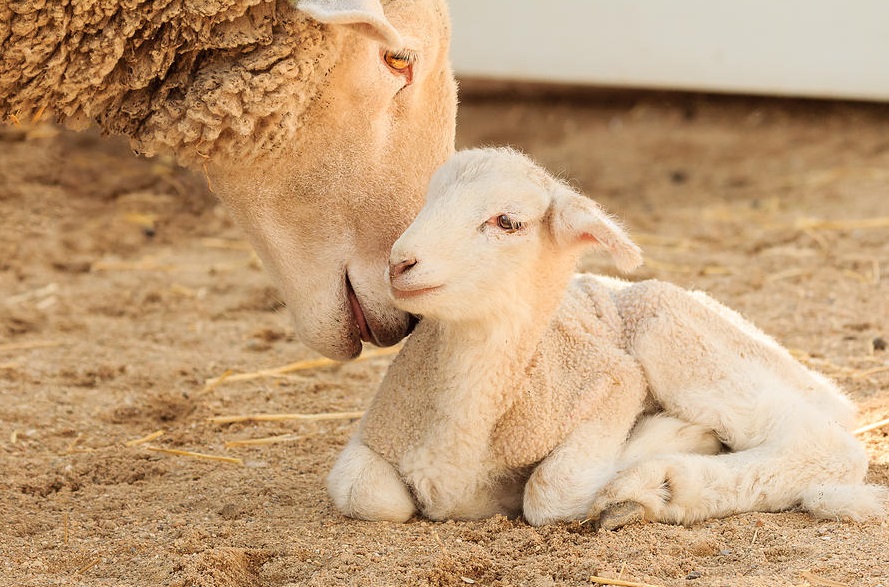
There are a couple of different theories on the origin of the name Imbolc. Some claim it derives from the Old Irish Gaelic i mbolg, meaning “in the belly”, and others believe it comes from the Old Irish Gaelic oimelc, translated as “ewe’s milk”. Either way, it refers to the same concept, the quickening of spring signified by the fact that most herd animals have either given birth by this time, or are nearing the end of pregnancy and are filled with milk. This is why Imbolc is also known as the “festival of the lactating sheep”.
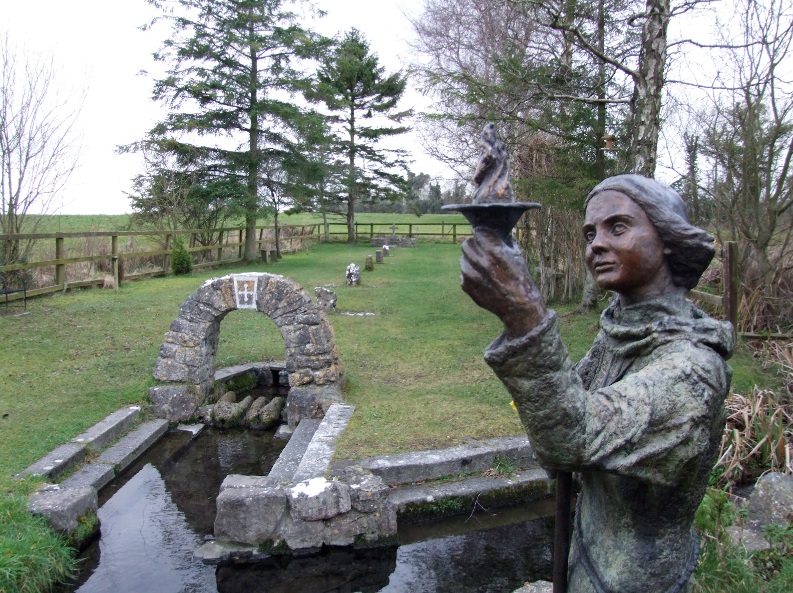 St. Brigid's Well - Kildare
 Though all Maiden goddesses are honoured at this time, the one most associated with Imbolc is Brighid (pronounced breed or breet). She is the Celtic goddess of the forge and hearth, as well as healing, childbirth, poetry and unity. She is often regarded as the patron goddess of bards, healers and smiths. Many believe that because Brighid was so widely honoured, the spread of Christianity across Europe could not abolish her worship. Instead she was “adopted” by the Church as St. Brigid and Imbolc became St. Brigid’s Day and Candlemas.

This is the time of year to get rid of the old to make way for the new. In that spirit, a thorough spring cleaning of the house is often done. Acts of divination are performed, especially concerning the welfare and prosperity of the family. Naturally, many of the customs and rituals involve ensuring fertility and success in the coming year. New seeds and agricultural tools are blessed and consecrated, to prepare for the planting season just ahead.
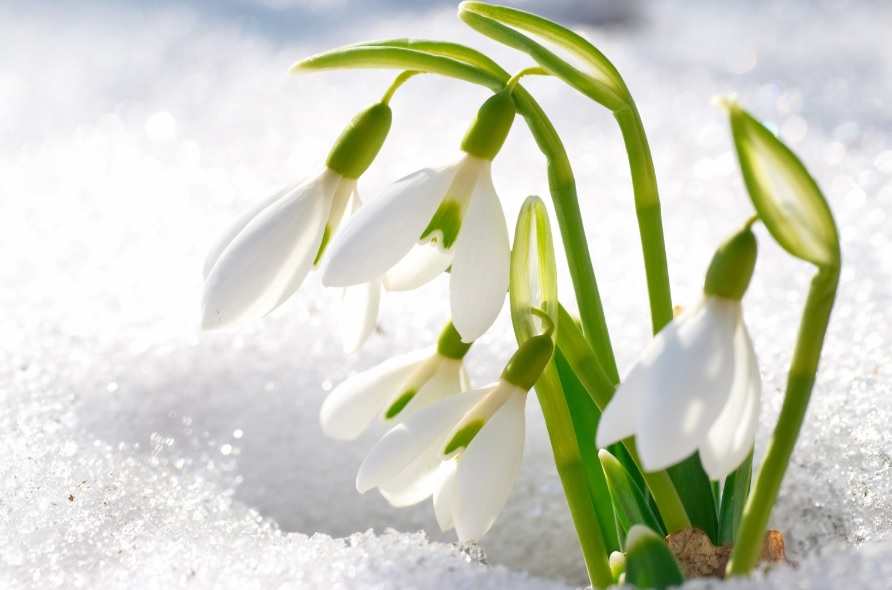
White flowers, especially snowdrops, are symbols of Imbolc, as they are one of the first signs of spring. The image of the flowers peeking through the blanket of snow brings assurance that spring is on its way
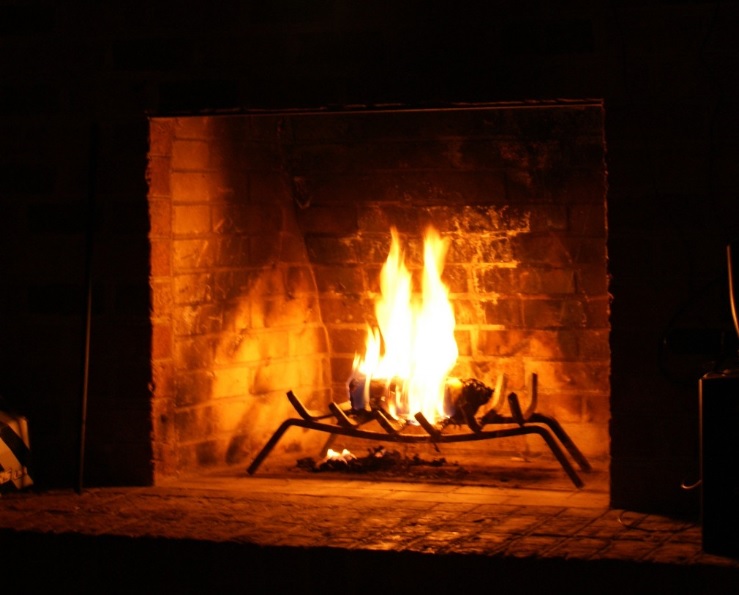
The fire of the forge, the fire of the hearth and the fire of creativity, all are associated with Brighid, so it comes as no surprise that the flames are an important symbol of Imbolc. At sunset, or after ritual, all the candles and lamps are lit, even if just for a few moments, to celebrate the returning sun and to welcome Brighid into the home.

Milk and all dairy products play a part in most Imbolc feasts, as they symbolize the nourishment of the newly born animals and children.
A Brighid’s Cross is often made and then hung above the doorways, for protection throughout the year. There are many variations of the Brighid’s Cross. The most common is the 4 armed version, though there is also a 3 armed, triskele type cross. Some say the 4 armed cross should be hung in the house, while the 3 armed cross is meant for the barn or cowshed. Others say that the triskele variation is the original, representing Brighid as a triple goddess and the fourth arm was added later to strengthen association with the Christian cross. Other variations include the God’s Eye, which I wrote about in the Mabon post, and an interlaced strand version.
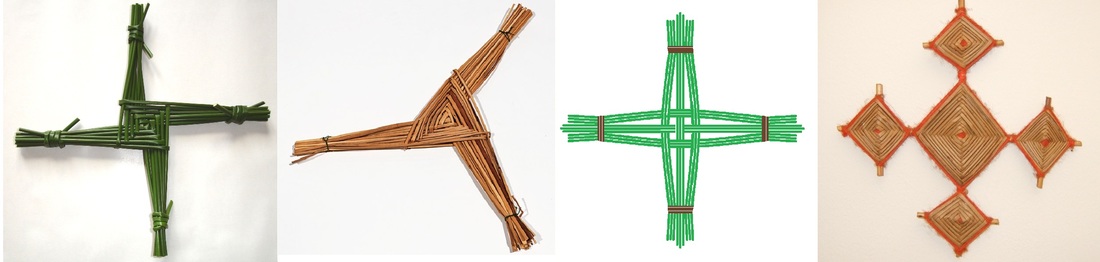
Variations of Brighid's Cross
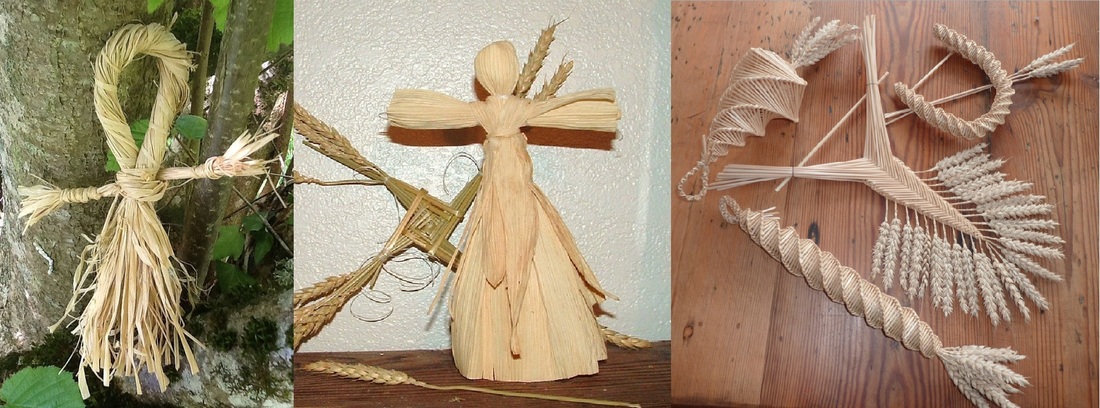
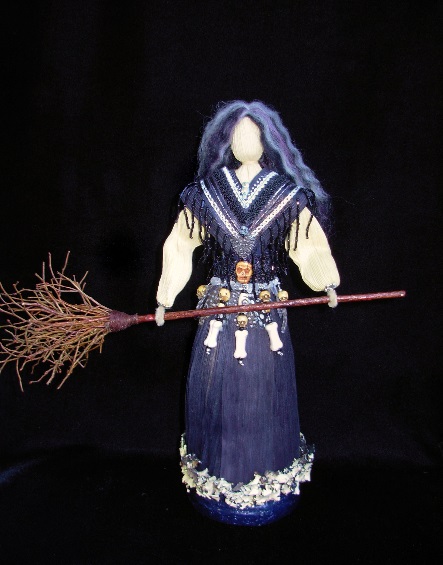
Brighid’s Dolls or Bridie Dolls were made to represent the goddess. These dolls were often carried from house to house to offer blessings. To bring good fortune and fertility to the home, they were placed near the hearth in a bed made for especially for them. After Imbolc, the dolls can be placed in the home to honour Brighid and invoke her protection. Some traditions will burn the dolls and mix the ashes with the seeds for the spring planting; others call for the doll to be buried with the spring crops.
Bridie Dolls are also known as corn dollies. Though called “corn dollies”, they’re not all made of corn husks. Many places in Europe refer to any grain as “corn”. You may have seen corn dollies that look nothing like a regular type doll. That’s because the word “dolly” in this case, is actually derived from the word “idol”. So a “corn dolly” is actually a “grain idol” made in homage to the harvest deities.
Bridie Dolls are also known as corn dollies. Though called “corn dollies”, they’re not all made of corn husks. Many places in Europe refer to any grain as “corn”. You may have seen corn dollies that look nothing like a regular type doll. That’s because the word “dolly” in this case, is actually derived from the word “idol”. So a “corn dolly” is actually a “grain idol” made in homage to the harvest deities.
Corn Dollies
Making a Brighid’s Cross
To start, you’ll need 12-16 pieces of reed or straw. (Drinking straws, pipe cleaners, thin willow branches, basket weaving materials, etc can be used as well.) .If they are dry, soak them in cool water for at least ½ hour to soften them up and keep them from breaking.
 | 1. Take one piece and hold it upright. |
 | 2. Take a second piece, fold it in half, wrap it around the 1st piece with the opening to the right and pull it tight. |
 | 3. Turn everything 90° counter clockwise while holding it in the centre. |
 | 4. Take a third straw, fold it in half, wrap it around the upright straw with the opening to the right and pull it tight. |
 | 5. Turn it all 90° CCW while holding it in the centre. |
 | 6. Fold a 4th straw in half, wrap it around the upright straw and pull it tight. |
 | 7. Turn it all 90° CCW while holding it in the centre. |
 | Repeat until all the straws are used or the cross is as large as you wish to make it. Try to build the weave so that the straws are resting beside each other and not bunching up or lying on top of one another. Watch for gaps and reposition or tighten the straws as necessary. Tie off the ends of each arm with a piece of twine or string, cut any uneven ends if you wish and you’re done! |
The three armed Brighid’s Cross is a variation that starts the same as above, once you get to step 7, you’ve got the basic 4 armed cross shape. At this point, you need to bend the upright arm and the single straw toward each other to make 3 evenly spaced arms. It’s a little harder to start, but after adding the next couple of straws, it’s just as easy as the 4 armed version.
Making a Bridie Doll
There are many different ways to make corn dollies, and they can be made of a variety of materials.
Corn Husk Dolly

It may be difficult to find fresh husks at this time of year, the produce section at the grocery store may have some. Otherwise, you may have to think ahead and save some from the last autumn. If you are using dried husks, soak them in lukewarm water for a couple of hours to soften them up. You’ll also need some yarn, twine or ribbon to tie the husks. Cotton balls, dried flowers or corn silk can be used as stuffing.
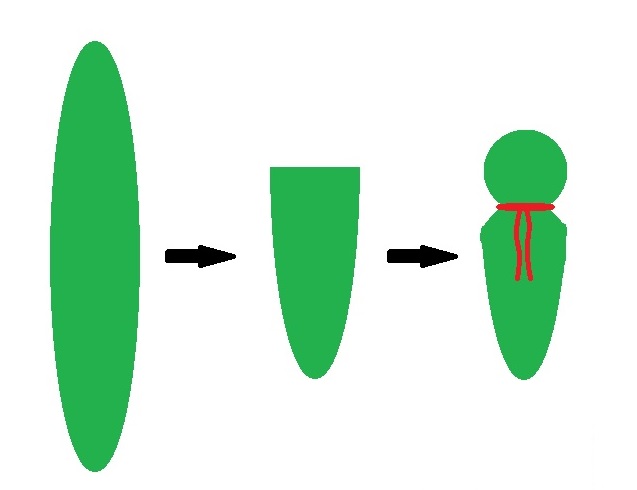 | Take a strip of the husk and fold it in half. Put some stuffing in the middle, give the husk a twist and tie it off just below the stuffing to make a head. There should still be some of the husk hanging in front and back to create the torso. |
 | Stack a couple of smaller husks together and tie them at the ends to make the arms and hands. Slip the arms between the husks forming the torso, then tie off at the waist. You can plump up the dolly by adding some stuffing before you tie it. |
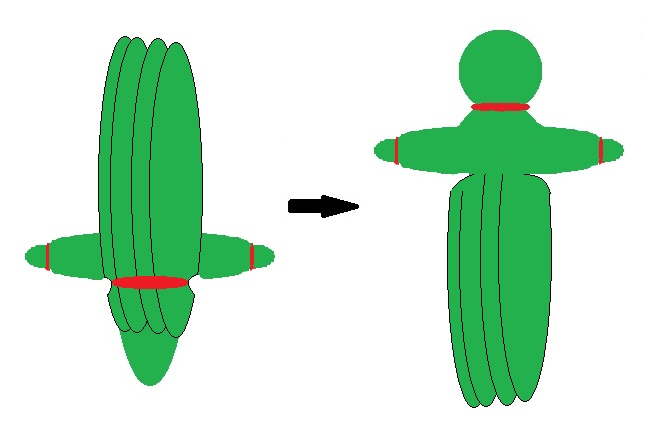 | Arrange a few husks around the waist so that they cover the head of the dolly. Cover the front, back and sides, overlapping the husks a little bit. Once they are arranged, tie them in place around the waist. The dolly should look like she has her skirt up around her head. Carefully fold the husks down once they have been tied, so that the skirt is downwards, covering the “legs”. Trim the hem of the skirt and let the dolly dry completely. |
Once the dolly is dried, you can leave her as is, or give her a face, hair, clothing, whatever strikes your fancy!
Wheat Dolly
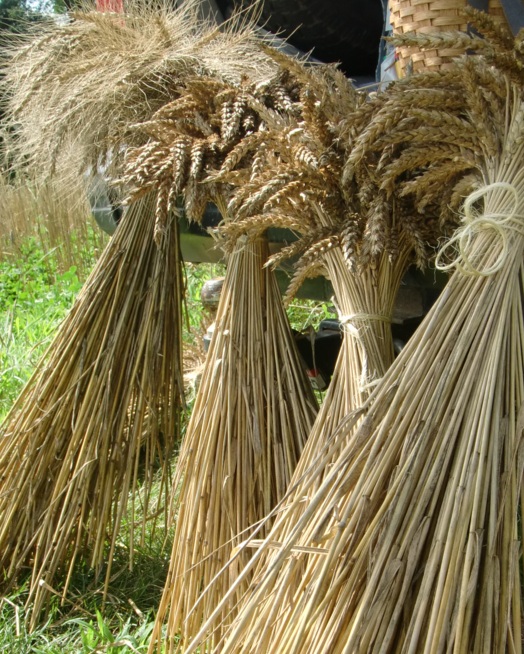
Choosing your grain is the first step and there are a couple of important points to make here. The stalks should be nice and long and straight and able to stand upright (at least 18” from the base of the head to the first joint on the stalk). The stem of the stalk should be nice and golden; stalks that are green won’t ever ripen to gold once they’ve been cut.
Soak the stalks for 30 minutes or so in lukewarm water before you start your doll. After they’ve soaked, wrap them in a wet bath towel let them sit for about 15 minutes, then they will be ready for weaving. Leave the stalks you aren’t currently weaving wrapped in the towel to keep them from drying out.
Soak the stalks for 30 minutes or so in lukewarm water before you start your doll. After they’ve soaked, wrap them in a wet bath towel let them sit for about 15 minutes, then they will be ready for weaving. Leave the stalks you aren’t currently weaving wrapped in the towel to keep them from drying out.
This technique calls for a base to weave around, creating a thick spiral of wheat. The thickness will depend on the size of the base. You can use a removable core such as a dowel, creating a hollow core. Or you can use a few wheat stalks as your base, and incorporate them into the dolly.
Start with five stalks with heads, and 20-30 stalks with stems only. Tie the five pieces with heads around the base, as close to the wheat heads as you can. Cut the stalks in slightly different lengths, this will help stagger joins when you need to add another straw.
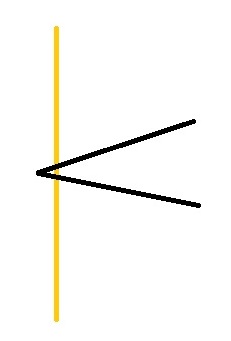
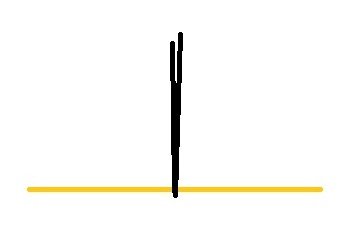
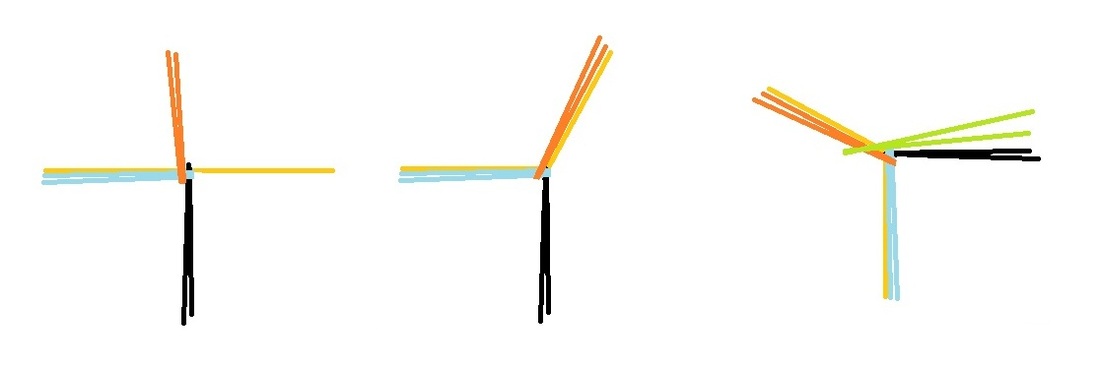
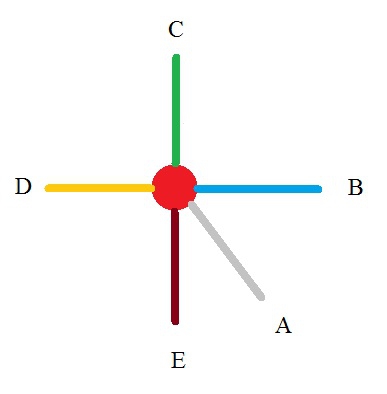
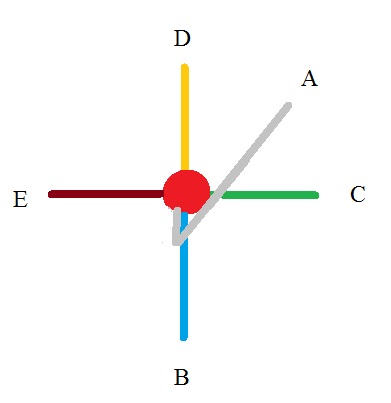
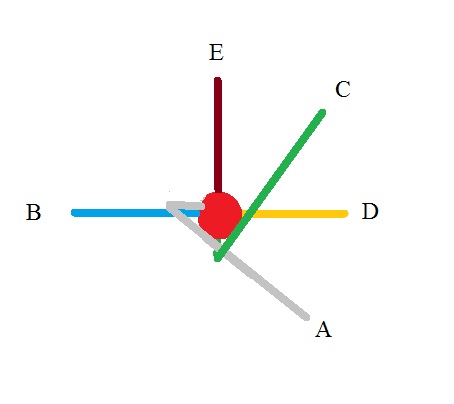
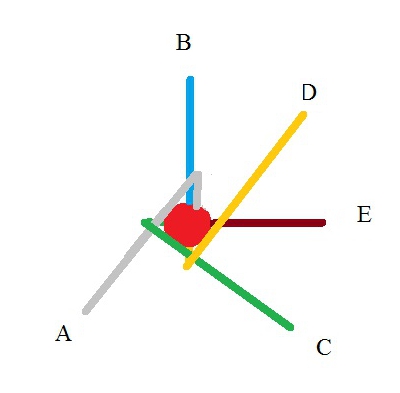
Bend each stem to a 90° angle, so that 4 of heads point north, east, south and west respectively. The fifth stem should be bent to the right between the south and east stems. We’ll call the stems A, B, C, D and E, as in the picture.
Bend each stem to a 90° angle, so that 4 of heads point north, east, south and west respectively. The fifth stem should be bent to the right between the south and east stems. We’ll call the stems A, B, C, D and E, as in the picture.
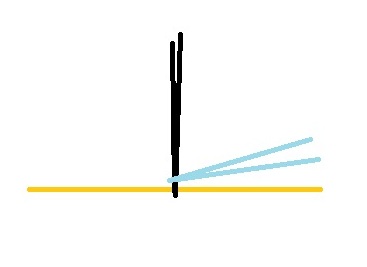
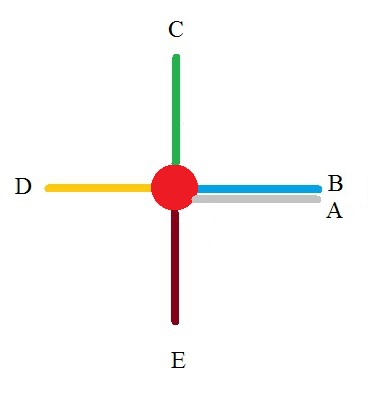 | 1. Bend the stem A up a bit so it runs parallel to stem B. |
 | 2. Fold stem A over stem B and it will also cross stem C. * |
| *Note The straw should be folded in a two stage process 1. Lift the straw so that it is vertical. 2. Bend the straw over the straw by its side. |
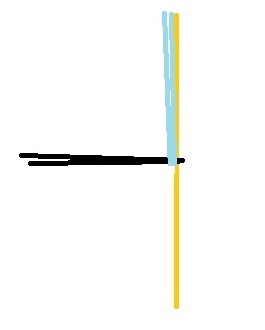
 | 3. Turn the base 90° clockwise, B should now be pointing south. |
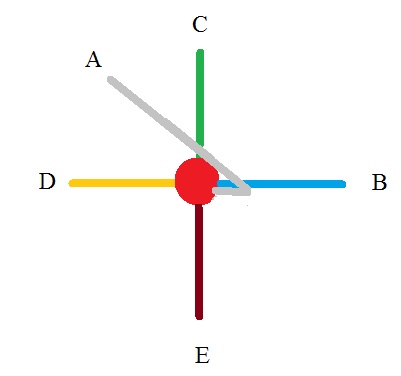
 | 4. Fold stem C over stem A and turn 90° clockwise. B is now pointing west. |
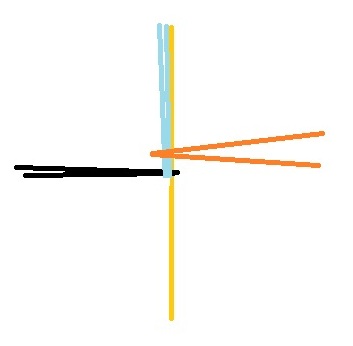
 | 5. Fold stem D over stem C and turn 90° clockwise. B is now pointing north. |
 | 6. Fold stem E over stem D and turn 90° clockwise. B is now pointing east. If you turn the dolly slightly, you can see that it is in almost the same configuration as when you started, with stem B in the position of stem A. So just repeat steps 1 through 5 again and again until the dolly is the desired size, or the stems are getting short. |

When your stems are starting to get short, you can join more stems. Cut the small end of the new stalk at an angle, and slip it into the larger, hollow end of the woven stem. Stagger the joins so that there is only one in each circuit around the base or it weakens the spiral.
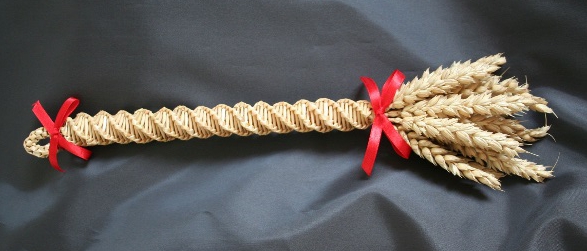
When your dolly is the size you wish it to be, either remove the base or snip the protruding end of the base close to the weave. You can finish the dolly by simply tying off the ends with a ribbon, straw or piece of string. You can also make a “handle” for the dolly by plaiting the five stalks for a few inches, then bending this braid over the top of the dolly. Secure the ends by threading them through spaces in the weave.
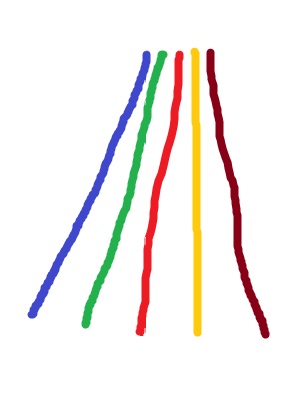
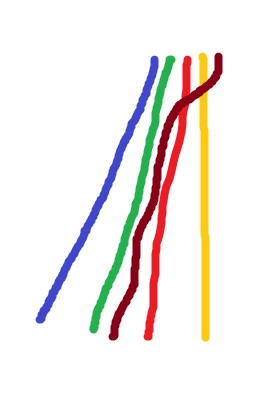
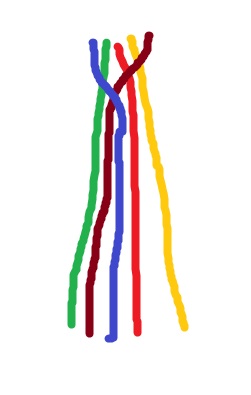
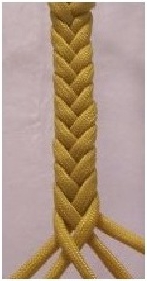
Making a 5 Strand Braid
I've seen a couple different ways to do this, but the easiest is what I call the “Over 2” technique.
I've seen a couple different ways to do this, but the easiest is what I call the “Over 2” technique.
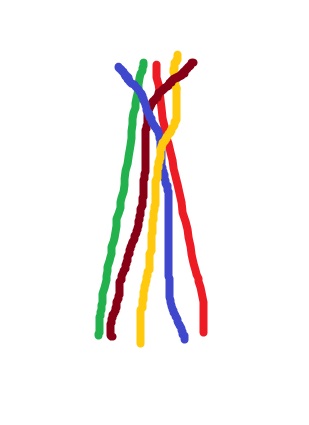
| 1. Arrange your strands so that they are slightly fanned out. | 2. Cross the right strand over the 2 strands to the left. In this case, the brown strand over the yellow and red strands. | 3. Take the left strand and cross it over the 2 strands to the right. Here, the blue crosses over the green and brown. |
 |  |  |
| 4. Again, the right strand over the 2 strands to the left. The yellow over the red and blue. | 5. And again, the left over the 2 to the right. So the green crosses the brown and the yellow. | 6. Repeat these steps until the braid is the desired length! |
 |  |  |
It's the dawn of a new year, the earth is waking from her long sleep. Celebrate the return of light and warmth to the land.
Happy Imbolc and Goddess bless!
Happy Imbolc and Goddess bless!
 RSS Feed
